Converting a cargo trailer into a camper is one of the most budget-friendly ways to get your own tiny home on wheels. You start with a blank box, add insulation, build out the interior, wire in some power, and—voilà—you’ve got a cozy rig ready for weekend camping or full-time travel.
But here’s the problem: costs have a sneaky way of creeping up. What starts as a “cheap DIY project” can balloon into a money pit before you know it. That’s price creep, and if you don’t manage it carefully, you may end up spending as much as you would have on a factory-built camper.
Let’s take a look at the types of price creep that can hit during a cargo trailer conversion, why they happen, and—most importantly—what you can do to avoid them.
What Is Price Creep?
Price creep is the gradual increase of costs beyond your original budget. Unlike big one-time expenses (say, buying a $5,000 air-conditioning unit on impulse), price creep is more like death by a thousand cuts. It’s the constant “well, it’s only $50 more” decisions that add up until you realize you’ve overspent by thousands.
When building a cargo trailer camper, price creep tends to fall into a few categories.
Types of Price Creep in Cargo Trailer Conversions
1. Upgrade Creep
This is the classic “while I’m at it” trap. You start with a basic plan—say, installing a simple vent fan—and then decide that for just a little more you could get one with a thermostat, rain sensor, and remote control. Then you start thinking, “Well, why not upgrade the wiring to 12-gauge while I’m at it?”
Pretty soon, every component is “just a little more,” and your project doubles in cost.
Examples of upgrade creep:
-
Choosing spray foam insulation instead of rigid foam board.
-
Swapping budget laminate counters for butcher block.
-
Going from a $200 inverter to a $1,000 pure sine wave inverter.
2. Tool Creep
Tools are the silent assassins of your budget. You might assume you already have everything you need, but cargo trailer conversions often require specialized gear. A $50 drill bit set here, a $200 miter saw there, and suddenly your “cheap build” requires a mini Home Depot investment.
Examples of tool creep:
-
Buying an angle grinder, orbital sander, or rivet gun “just for one job.”
-
Upgrading from basic hand tools to cordless sets with spare batteries.
-
Collecting clamps like you’re starting a museum.
3. Feature Creep
This is when your project grows beyond its original scope. You intended to build a weekend camper, but halfway through you decide to add solar panels, a water system, a composting toilet, and maybe a wood stove. Congratulations—you’ve just turned your $5,000 project into a $15,000 one.
Examples of feature creep:
-
Adding a bathroom when you originally planned on campground showers.
-
Expanding sleeping space for “just in case guests.”
-
Installing extra cabinets or fancy slide-outs you hadn’t budgeted for.
4. Quality Creep
Sometimes you start with cheap materials but quickly get frustrated and upgrade to premium versions. It’s understandable—you want your camper to last—but replacing things mid-build can crush your wallet.
Examples of quality creep:
-
Switching from ½-inch plywood to marine-grade.
-
Replacing budget hinges and drawer slides with soft-close hardware.
-
Upgrading from budget flooring to waterproof luxury vinyl planks.
5. Measurement Creep (a.k.a. “Oops” Costs)
Mistakes happen. You cut something wrong, order the wrong size, or realize too late that your fridge doesn’t fit through the trailer door. Each mistake means another trip to the store (and more money out of your pocket).
Examples of measurement creep:
-
Buying twice the insulation because you miscalculated square footage.
-
Cutting plywood wrong and needing another sheet.
-
Wasting plumbing fittings because of layout changes.
6. Lifestyle Creep
This one’s sneaky. You see what other builders are doing on YouTube or Instagram and suddenly your basic camper doesn’t feel good enough. Before you know it, you’re copying upgrades you never planned for.
Examples of lifestyle creep:
-
Adding a rooftop deck because you saw it online.
-
Installing decorative shiplap when painted plywood would do.
-
Buying a high-end mattress when a basic foam topper was in the budget.
7. Time Creep
Time is money—even if you’re not paying labor. A build that drags on costs you in gas for repeated supply runs, take-out food when the kitchen is full of tools, or even storage fees if you can’t keep the trailer at home.
Examples of time creep:
-
Stretching a 3-month build into 18 months.
-
Delays from waiting on special-order parts.
-
Burnout leading to half-finished work that requires fixes later.
Why Price Creep Happens
Price creep isn’t just about poor planning. It’s about human nature. We want the best we can afford (and sometimes what we can’t afford). We get excited, distracted, or influenced by others. We underestimate how much tiny costs add up. And when you’re building something as personal as a camper, it’s easy to justify spending “just a little more.”
How to Avoid Price Creep in Your Cargo Trailer Conversion
Now for the good news: price creep can be controlled. Here’s how.
1. Start With a Realistic Budget
Don’t just pick a random number. Research the average costs of conversions similar to yours. Break your budget into categories: trailer, insulation, electrical, plumbing, furniture, finishes, tools, and miscellaneous.
Pro tip: Add a 20% “oops fund.” Price creep thrives on surprise costs. If you plan for them, they won’t derail you.
2. Define Your Non-Negotiables
Decide early what matters most. If you care about having a warm, well-insulated trailer, spend there—but accept that you may need to cut costs elsewhere. If a comfortable bed is your priority, maybe you skip the fancy solar array for now.
Write these priorities down and stick to them when the “shiny object syndrome” hits.
3. Avoid the “Just One More Upgrade” Trap
Ask yourself three questions before upgrading:
-
Does this add real value to how I’ll use the trailer?
-
Can I add it later if I really need it?
-
Am I upgrading because I want it, or because I saw someone else do it?
If the answer to #3 is Instagram, it’s probably not worth it.
4. Plan Your Build in Phases
You don’t need every feature on day one. Start with a basic shell that’s usable: insulation, bed, minimal power. Then add solar, plumbing, or fancy cabinetry later. This spreads costs out and reduces the temptation to splurge all at once.
5. Borrow or Buy Used Tools
Instead of buying every tool, see if you can borrow from friends, rent from hardware stores, or buy used. Once the build is done, you won’t need most of those specialty tools anyway.
6. Shop Smart for Materials
-
Check Habitat for Humanity ReStores, Craigslist, or Facebook Marketplace.
-
Buy surplus building supplies at auction.
-
Don’t be afraid of “scratch and dent” appliances.
Every dollar saved on materials is a dollar that can be put toward essentials.
7. Measure Twice, Cut Once (Seriously)
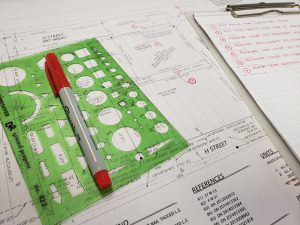
Triple-check your math before cutting or ordering. Keep a dedicated notebook with all measurements. Sketch layouts before buying big components. Mistakes are the most preventable form of price creep.
8. Set a Hard Stop on Budget
Treat your budget like a maxed-out credit card. If you hit the number, you’re done—at least for now. This forces you to prioritize and prevents endless feature creep.
9. Track Every Expense
Use a spreadsheet, app, or even a notebook. Write down every purchase, no matter how small. That $12 pack of screws might not seem like much, but multiply that by 20 trips to the hardware store and you’ll see why your budget is evaporating. Use this simple conversion budget spreadsheet to help stay on track.
10. Keep Your Project Scope in Check
Before you add that rooftop deck, remind yourself: this is a cargo trailer camper, not a luxury RV. Simple and functional usually wins. The goal is to get on the road, not to build the Taj Mahal on wheels.
The Bottom Line
Building a cargo trailer conversion is one of the most rewarding DIY projects you can take on. But it’s also a minefield of hidden costs and budget busters. Price creep can sneak in through upgrades, tools, mistakes, or just plain over-enthusiasm.
The best defense? Plan smart, spend with intention, and remember why you started the project in the first place: to have an affordable, functional camper that lets you get out and explore.
Your Turn
Now I’d love to hear from you:
-
Have you ever dealt with price creep on a DIY project? What surprised you most?
-
What’s one upgrade you splurged on that was worth every penny?
-
Do you prefer phasing your builds or going all-in from the start?
-
What’s the best budget hack you’ve used on your cargo trailer or camper build?
-
If you could go back, what’s one thing you’d do differently to keep costs under control?
Drop your thoughts in the comments below—your experience might save someone else a whole lot of money.


